The market for barbecue goods is full of various options of barbecue and roasting. A barbecue grill is the choice of many customers, and often it is very good and reliable.
But if you have a used washing machine, you can make a grill from its drum no worse. Investments are minimal, but in the end you will get a beautiful, functional and durable hearth. Look for the benefits, the necessary tools and manufacturing instructions below.

The benefits of a barbecue from a washing machine
Throwing away or giving away quality parts from a washing machine for nothing is not the best option. Especially when you can make a great brazier from the tank.
If you decide to make it from a washing machine, then you will get many advantages:
- Durable If the tank material is stainless steel.
- Absolutely safe. The drum is round, without sharp corners. If there are any protruding parts, they can be "finished with a file."
- Hygiene No rust (thanks to stainless steel) - enhanced disinfection is not required.
- Minimum costs of firewood or coal: in a round bowl the heat does not dissipate in vain - each coal takes part in the frying process.
- Easy disassembly and transportation - for camping enthusiasts.
- Resistant to high temperatures.
- The meat is cooked quickly thanks to the holes into which air enters, fanning the heat.
As you can see, the barbecue from the washing drum has a place to be due to its excellent functional qualities.

Instruction: barbecue from the drum of the washing machine do-it-yourself
Before you make this useful device, you should prepare the necessary tool. In addition to the stainless drum, you will need:
- Bulgarian;
- welding inverter;
- file;
- pliers;
- fasteners and bolts;
- corners of metal;
- small adjustable wrench.
To build comfortable legs, find 3-4 tubes or thick metal rods. Instead of legs, home craftsmen often use improvised means: metal flower stands, tripods from the old bar stool, and so on.
How to make a barbecue grill: step-by-step guide
- Prepare the tank. A small drum can be used without alterations, and a large one can be cut into two halves.
- If you saw the tank into 2 parts, then insert one part into the other and brew - the reliability of such a barbecue will double.
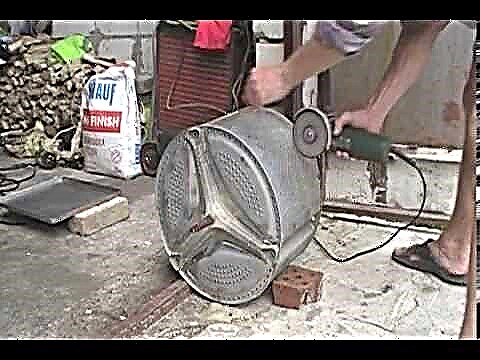
- The third option for working with a tank - large or small - is simply to expand the hole by cutting a large rectangle in the center with a grinder.
- Now you need to attach the stand (legs). If you use tubes, then weld them on the sides of the tank or fix them with bolts - so the legs will be removable. For stability, you can make a metal bar that will connect all the legs together.
If a tripod is used as a stand, then weld it from the bottom.Since the leg is spinning, you can easily inflate the fire. The flower stand attaches in exactly the same way.
- The final stage in the manufacture of a homemade grill is the arrangement of a stand for skewers or grill. To do this, weld the corners at the top of the tank.


Important! Processing and painting an impromptu barbecue is not necessary. Only legs can be protected from corrosion.
You can make additional accessories for the barbecue: weld hooks for barbecue equipment - tongs or forks. Or make a lid to fry kebab in rainy weather.
In addition to the drum, the washing machine still has many details in which you can breathe a second life. For example, a lawnmower or a juicer can be made from an engine. And from the machine’s body - a smokehouse.

Of course, not every motorist will like the size of such a device, but if desired, the drum can also be cut across and bolted together - then you will get a full folding brazier.
The main advantage of homemade work is that you made it yourself, honestly, which means that the meat will be even tastier.