Although tanks in modern cars are made of durable composite materials, they are still not immune to breakage. Sometimes the symptoms of a malfunction are so obvious that it becomes clear that replacing the tank in the washing machine is inevitable. How to carry out complex repairs yourself and successfully launch the washer?
When is tank removal required?
The tank is the center of the machine, without which the operation of technology is impossible. Many users confuse it with a drum, but these are a priori different elements. The drum is inside, it is you who see it when you open the manhole door when loading dirty laundry.
The tank is created from plastic and frames the drum. A pulley with a drive belt is attached to the back, which activates the washing mechanism. There are also stainless steel designs, but these are rarely used due to their heavy weight and noisy performance.

Why does this element fail? Here are the main causes of breakdowns:
- When washing, a sharp object penetrated inside and damaged the tightness.
- The case cracked.
- Worn oil seal or bearing.
The result is a leak, and possibly a complete stop of the washing machine. Although the two parts of the tank are made of durable composite materials, the likelihood of breakage is not excluded - every day it is subjected to enormous loads: vibration, temperature extremes, contact with water.

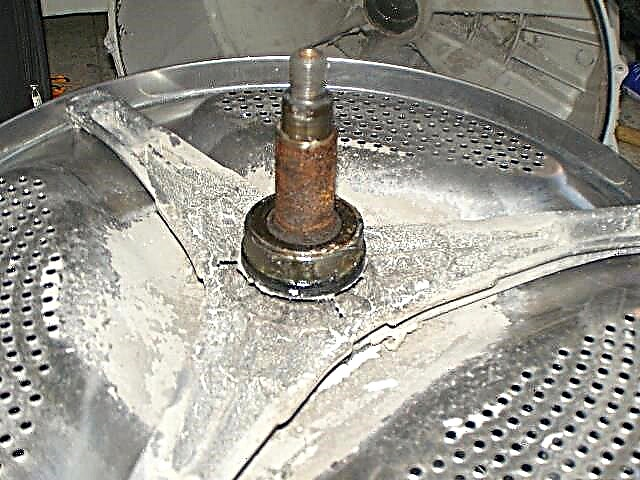
When the bearing is worn, you can hear loud noises and creaks. Damage is confirmed by rusty streaks in the pulley area. A foreign object often blocks the rotation of the drum, and a crack invariably causes leakage. Such signs should lead to disassembly of the AGR, inspection of the internal parts and replacement in case of breakage.
How to replace the washing machine tank?
Such repairs require serious preparation. Start by picking tools. Required:
- a set of Phillips and flat head screwdrivers;
- spanner keys;
- pliers;
- chisel and hammer;
- hacksaw for metal.
Important! In the washing-ups of the Ariston and Indesit firms, the tank is not collapsible, but integral.
More often in machines they install collapsible devices fastened with bolts around the perimeter. But sometimes the bolts are replaced by a weld. Therefore, you need a hacksaw. Further, the most difficult and time-consuming business is disassembly.
DIY disassembly
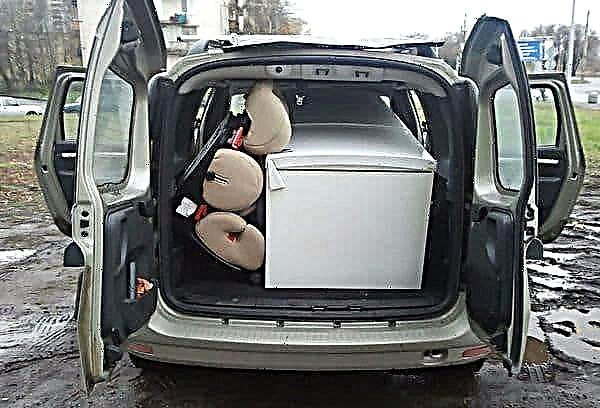
Think about whether it will be convenient to carry out repairs in the room? Perhaps it is better to take the car to the yard or to the garage. There should be enough space. The first and most important thing is to disconnect the equipment from the network and communications. Proceed as follows:
- Disconnect the AGR from the electricity.
- Close the inlet valve.
- Prepare the container and disconnect the communications from the SMA housing.
Now you need to drain the remaining water. For this:
- Disconnect the base panel (door) under the loading door.
- Substitute the container.
- Unscrew the drain filter. In some models, it is additionally screwed.

- At the same time, clean the part from debris.
Also pull out the detergent drawer by pressing the latch in the center. It remains water, which can get on the electronic board. Further:
- Having unscrewed two screws from the back, remove the top cover.

- Unscrew the fasteners around the perimeter, dismantle the rear panel.
- Remove the drive belt.

- Lock the pulley in one position and unscrew the central bolt. If it does not respond, spray with WD-40. Move the pulley aside.
- Go downstairs. Disconnect the engine wiring, as well as the wires going through the tank. They are attached with plastic clamps.

- Remove the mounting bolts and remove the motor from the washing machine.
- If the leads of the heating element are visible from the rear (sometimes it is attached to the front), then disconnect the terminals, do not completely twist the central nut and push the bolt inward. Remove the heater from the socket.

- A counterweight can also be attached to the rear. Remove the bolts and remove it.
In some washing machines, it is easier to get to the pump from below. If the bottom is removable or completely absent, then turn the case over on its side. Otherwise, look for the assembly behind the front panel.
Look under the bottom:
- Unscrew the pipe and hose clamps leading to the tank and pump with pliers. Remove them from place.
- Unscrew the pump mount, disconnect the wires.

- Remove the pump along with the snail. If this does not interfere with further dismantling, then turn the pump and pull it out of the scroll.
Remove the bolts that secure the shock absorbers to the bottom or walls of the housing. Park the machine in its normal position and return to the top. What to do:
- Remove everything that attaches to the top of the tank.
- Tighten the counterweight bolts and remove it.

- Wring out collars and remove hoses leading to a powder collector. Remove from the case.
- Remove the fixing screws around the perimeter and disconnect the control panel (in addition, it is attached to the latches).
- Wiring can not be turned off.
If nothing else bothers you from above, go to the front:
- Bend the rubber of the hatch and, prying off with a screwdriver, remove the clamp.

- Insert the cuff inward.
- Remove the two lock screws (UBL).
- Put your hand behind the case, remove the lock, disconnect the contacts.

- Remove all screws around the perimeter of the panel, lift and remove to the side.
To remove, raise the tank by removing the hooks from the springs and remove it from the housing through the front or top. The hardest job is over.
Dismantling and replacing the tank
Now inspect the structure again. If the two parts are bolted together, pull them out and disconnect the halves. If this is a one-piece seam, then install the element on the rib and saw along the weld. Be careful not to immerse the hacksaw too deep, otherwise the drum may be damaged.

After inspection, it turned out that the design is not repairable? Then a replacement is needed. The fact is that for Indesit and Ariston machines (and some other brands), only one-piece assembly with a drum is sold. Therefore, you can buy the assembly and install it in the washer in the reverse order.
Installation for SMA “Burning”, “Samsung”, “Atlant”, “Bosch”, LG is carried out in a different way. The stores sell tank parts (front and rear), as well as a drum separately. Therefore, after disassembly, it is enough to purchase the part that has failed. The backs are usually equipped with new bearing and stuffing box. Therefore, put the drum in place at home, fasten the halves with bolts and connect to the machine.
Even complex repairs can be done with their own hands, if you understand the design of the washer. It is important to choose the right accessories for replacement; purchase only for your make and model of machine. Definitely replacing the tank will cost less than buying new equipment. Especially if you do not overpay for the services of a master.