Combustion washing machines are widely distributed not only in the Russian market, but also in the CIS countries and the European Union. A lot of innovative solutions in these washing machines is good, but there are a lot of breakdowns from this. Therefore, the repair of Gorenje washing machines (Gorenie) is a daily concern of almost any workshop.
Read how to make repairs at home, and what kind of breakdowns are most often characteristic of this brand.
Typical crashes and breakdowns
Manufacturers of Gorenje washing machines know exactly how to make the equipment desirable and attractive for every customer. Today, these AGRs are so advanced that there are even models whose tank works autonomously and does not depend on the presence of water in the water supply.
Only now we’ll not talk about technical innovations and advantages of SM Gorenie, but about the most common malfunctions of the Gorenie washing machine, and how to fix them with our own hands.
The first thing you need to pay attention to is the most vulnerable places of various models of this brand. Using statistical data freely distributed by leading service centers of the Russian Federation, we compiled a list of typical breakdowns that are characteristic of almost any Gorenje model:
- The drain pump is the most vulnerable part. It breaks at a quarter of all cars of this brand. Replacing the pump is the optimal solution.
- The second place went to the thermoelectric heater. TEN breaks at least at a third of washers at which the warranty period has ended.
- The third on the list is a water discharge pipe.
- Fourth place - the engine brushes, which from frequent operation become unusable and require replacement.
We give an additional fifth place to the handle of the hatch door - its failure occurs in every 5th machine. The most important thing with such a breakdown is to find the original part to replace.
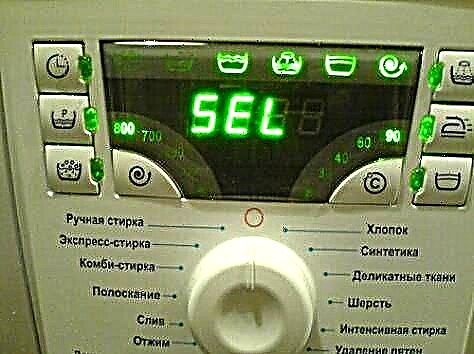
Important! Error codes often help to identify a breakdown: F1, F2, F3, F4 and others.
Drain pump: check and replace the pump in the car
Drain pumps in the Gorenie washing machine do indeed break too often and wear out faster than other nodes.
Cars of this brand are characterized by increased sensitivity to water, in which there are many different impurities. The movable elements are located almost side by side, so the water stone deposited on them interferes with the work. Parts wear out faster, after all, the pump fails and needs to be replaced.
Replacement or independent repair of the drain pump takes place in this way:
- Unplug the appliance.
- Remove the detergent drawer. Pour out the remaining water from it, put it in place.
- Put the washer in a comfortable position.
- It’s easier to get to the pump from the bottom, so it’s better to put the machine on its side.

- CM Gorenie brands are closed with covers on either side, and the bottom is no exception. Therefore, you will have to unscrew a few screws to gain access to the "insides" of the machine from the bottom.


- Now you need to inspect the pump, checking its serviceability. It will take a tester to measure the resistance. Disconnect the wiring and start measuring. If the tester displays about 160 ohms, the pump is OK. If there are no indicators, then the pump is broken.
- Remove the pump by unscrewing the fasteners.

- Buy a new original part and install it instead of the old pump, reconnecting all the wiring.
- Attach the cover from the bottom, restore the vertical position of the machine and start the idle wash in test mode.


For your information! If you decide to do the repair yourself, be careful when working with the tester so as not to throw out the serviceable pump - then the problem will remain unresolved.
Leak in the drain pipe in the car
This problem can be attributed to specific breakdowns of the Gorenie brand. The specificity is that the nozzles, despite their strength, often wear out around the knee.
This usually happens for one of three reasons:
- Low quality materials. Cracks due to leaks occur due to factory defects.
- Hit in the knee of sharp objects.
- Too aggressive washing chemicals.
Important! Do not fall prey to advertisements that say that magic means will save machine parts from scale and blockages. This chemistry is so aggressive that some details may suffer from it.
In such a situation, do-it-yourself repairs to the Gorenje washing machine should begin with a check on both the hoses and the pipes. Start with a drain hose - it's easier to get to.
To check the nozzle, you need to know how to disassemble the Gorenje washing machine. Access to the pipe is also provided from the bottom, it is located next to the pump.

Proceed as follows:
- Buy a new original part.
- Twist collars holding the damaged old branch pipe.
- Remove the nozzle.
- Put a new one, fix the clamps, assemble and turn the washer over.
Attention! When installing a new pipe, ensure that all joints are tight. But do not overtighten the clamps so as not to damage the part.
Blown heater in the Gorenje car: check and replacement
TEN is a vulnerable unit of any machine, including the Gorenie brand. The heater breaks for a number of reasons:
- Hard water with heavy impurities, which in the form of a water stone settle on a thermoelectric heater. A thick layer of scale does not allow the heat generated by the heater to pass through, so it burns out.
- Voltage drops in the network.
- Features of use - improper shutdown of the machine, washing at high temperatures, etc.
In general, if your SM has stopped heating water, and you want to repair the automatic machine yourself, you need to start by checking the heater - you may even need to replace it.
The work is carried out in the following order:
Attention! If the heater is not broken, but the water does not heat up, check the temperature sensor (it is located on the heater) and the wires coming from it.
Consider how to remove the old heater from under the drum:
- Take it off. You will find a nut between the two contacts of the heater - right in the center.
- Press pliers on the mount to remove the heater. But do not overdo it so as not to break other details.
- Grasp the contacts and loosen the heater, pull the part towards you. If everything is completely bad, and the heater is very tight, use a universal lubricant, such as WD-40, and swing the heater again - it should give in.
- Having taken out the old heating element, do not rush to install a new one. Use your fingers (preferably with gloves) to clean the hole in which the heater was located - at the bottom of the tank you will find a mountain of garbage, especially if your typewriter is not the first year.

- Now put a new part. Insert the heater into the groove and check if it is tight.

Important! Together with the heater, the craftsmen advise changing the rubber gasket as well.
- Tighten the nut, but not so much so as not to break the thread.
- Replace the wires, put the drive belt on the pulley.
- Close the hatch, put the washer in place, connect to all systems and turn on the test wash.
Worn brushes in a typewriter
Wear of engine brushes is an equally rare breakdown for Gorenie brand washers. You can determine it by the following signs:
- The power of the engine is significantly reduced, so the drum starts to rotate slowly.
- An unpleasant smell of burned rubber may come from the machine. When washing, when the engine turns on, you can hear a crack.
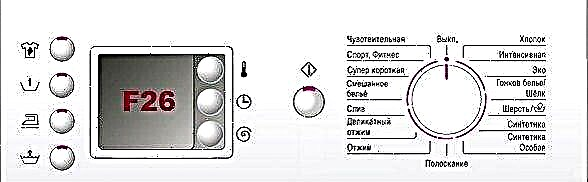
- Brush wear is often recognized by a self-diagnosis system. In this case, DTC F4 lights up.
Repair of Combustion washing machines in this case consists in checking the engine. In 8 out of 10 cases, the problem is in it. The verification should be carried out as follows:
- Open the hatch located on the rear of the machine.
- Under the drum you will find a motor.

- Remove the drive belt so that it does not interfere with the test.
- Remove the bolts that hold the engine.

- Go around the AGR and remove the powder receptacle, drain the wastewater and reinstall the cuvette.
- Put the washer on its side, remove the bottom.
- Remove the wiring from the engine.
- With a strong and precise movement, pull the engine out of its seat.

- Now your task is to remove the brushes and inspect them. If the brushes are worn out, you certainly will not confuse them with new ones. Old brushes are too scruffy, worn out and the smell of burning comes from them.


- After making sure that the brushes are unusable, install new ones.
- "Land" the engine and run the wiring.
- Close the bottom panel.


Important! The engine must be fully installed so that there are no breakdowns in the future.
- Put the machine in working position.
- Fasten the engine bolts at the rear.
- Replace the drive belt by putting it on the pulley.
- Replace and screw the service hatch.
- Connect the machine to communications and start a test wash. You did it!
If you are interested in other breakdowns, for example, how to disassemble the door of the washing machine, read more about this in our other materials.